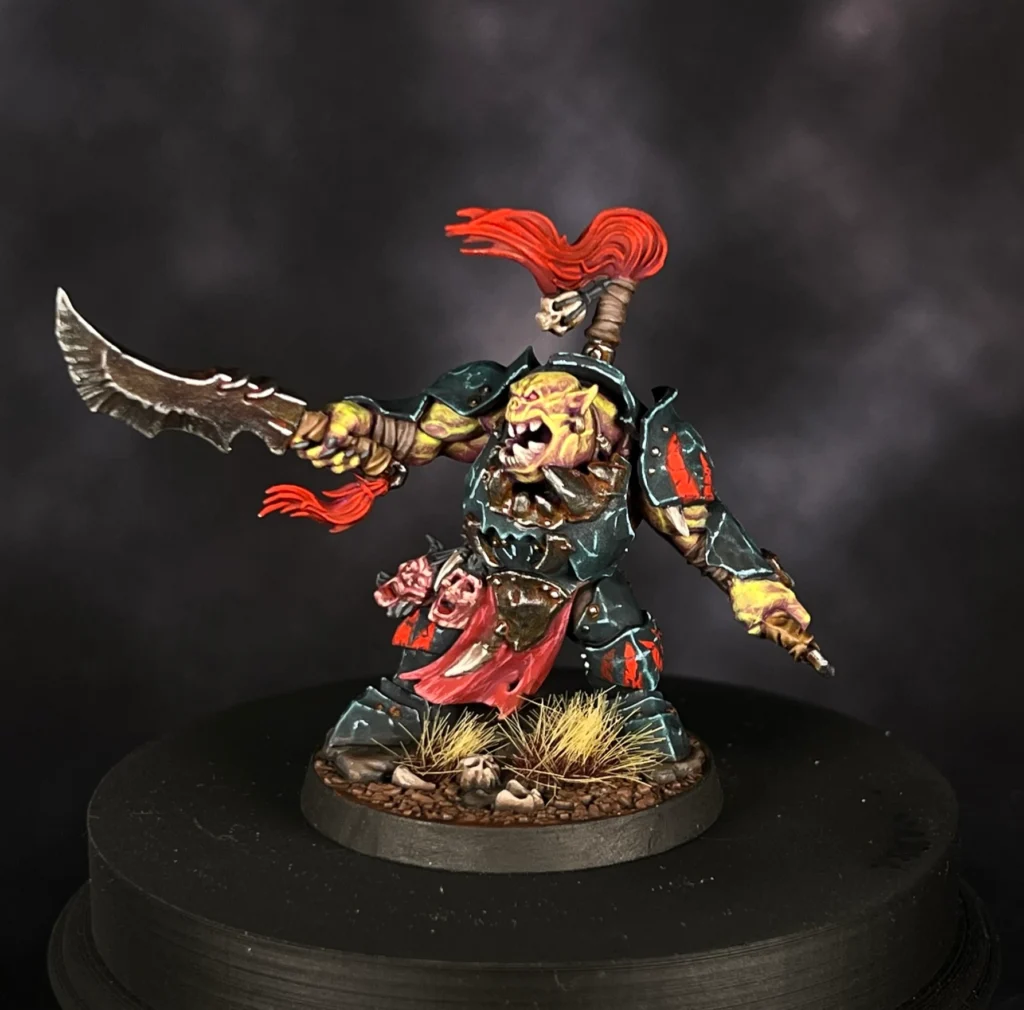
I bought Morgok’s Krushas when they first came out during the Beastgrave Season of Warhammer Underworlds. I procrastinated far too long on painting these, as they are gorgeous models with amazing details. Here is how I went about painting them.
Priming
Prime with Chaos Black spray and then Tamiya White from above. The Tamiya spray paint applied a little glossy which made some of the process more difficult than normal due to the reduced surface tension. GW Wraithbone or Grey Seer are also completely suitable for this process. I just didn’t have any on hand at the time.
My Orc skin recipe
I try new paints all the time. The new paints in this case, are the Golden So-Flat paints. I paint the skin of these models with only two paints. Golden So-Flat Red Violet and Golden So-Flat Yellow Green. First, apply a coat in pure Red Violet. Be sure that you mix this with some water to help it flow. The golden acrylics are thicker than some other paints that hobbyists may be accustomed to.

Building from the red-violet base, add the yellow-green a little at a time. Don’t stress too much about exact ratios in these steps, the placement of the highlights is what is more important when building up the skin layers. Build up these skin layers until you get to a color you are happy with. About 6 different layers were applied to my models and my final sharp highlights are pure yellow-green. Be sure to place your highlights towards the top of the shapes to sell the illusion of light hitting the model from above.

The Black Armor
Black is notoriously difficult to paint well. Use as much color as you can to add interest to “black” surfaces. In this case, I use Pro-Acryl Paynes Gray as my base coat. This color has enough blue in it to keep the shadows interesting and still read as black. Next, apply a heavy dry brush of Dark-Jade to the armor. The goal of the dry brush is to set some volume on the armor. Then, apply a light dry brush of Blue-Grey to the armor focusing just on the edges of the armor where possible. This highlight adds the illusion of a specular highlight and sets the armor plates apart from each other.
Now that the basecoats are set on the armor, the layers need to be blended. To do this, apply a glaze/contrast layer to tie the black together. Apply a 50/50 mix of Vallejo Black lotus and Express medium to the armor. This can also be achieved with black templar and contrast medium as well, although the mix may need to be heavier on medium since black templar is an insanely strong color.
Allow the tie-in layer to dry really well. Then, apply some thin lines and scratches with blue-grey again. Also roughly apply some edge highlights to the edges of the armor to further add definition.

Painting the leather
Leather can be any color you want. For the leather on these models, I paint a base coat of Pro-Acryl Dark Umber. Then, add successive layers of an off-white to the base color. My choice is Dark-Ivory for this purpose. Add a couple of layers of this until you are satisfied with the color of the highlights. The armor and the Skin are the real stars of the show in my scheme so add as much detail as you want to other bits.

Adding some color with red cloth/tassels
Burgundy is applied to the loin cloth of Ardskull and Morgok. Followed by a mix of burgundy and bright red for highlights. For the tassells, paint pure bright red to the finer pieces of hair. I use Pro Acryl Burgundy and Bold Pyrole Red for this, but Barak-Nar Burgundy and Mephiston Red work great as well.
Lets get metal
All the metallics on the model are done in the same way. Apply dark silver to chainmail, weapons, and scrap metal pieces. Highlight with a bright silver. Once the metallics are dry, weather the metallics. Agrax Earthshade is great for this. However, I use Dirty-Down Rust on my metallics for this step. Then, apply a dry brush with bright silver after the wash/weathering is dry. Finally, apply some edge highlights with bright silver for pop.
Teeth and bones
Paint light umber onto the teeth. Then, mix in some bright ivory into the light umber for highlights. Add as many layers as desired for the color of bone you want. I prefer bright-colored bone to improve contrast for gaming figures.
Finishing touches
To break up the large areas of black armor. I add some war paint in the shape of teeth on the armor with Burnt Red and Bright Pyrole Red. Add chipping to this with paynes gray to create the illusion of the war paint being applied to the armor. For the eyes, apply a dot of bright ivory or white, followed by a layer of Magmadroth Flame for bright orange eyes.
Bases
Warm brown is my choice for the base color and a reddish grey for the rocks. Mix in some Dark Ivory for both these colors for highlights. Give the base a wash with Agrax Earthshade to tie all the colors together. Next, apply some tufts of grass for some additional detail, I use Wasteland Tuft from the Army Painter. Finally, Paint the rims of your bases black to frame the miniature in!
Final Thoughts/notes
I prefer Pro-Acryl paints for my painting processes these days, but that does not mean this process can’t be followed with other paints. Here are some alternatives for the colors I use.
- Paynes Gray -> Dark Reaper
- Dark Jade -> Thunderhawk blue
- Grey Blue -> Fenrisian Grey
- Golden Red-Violet -> Barak-Nar Burgundy
- Golden Yellow-Green -> Moot green
- Burgundy -> Barak-Nar Burgundy
- Bold Pyrrole Red -> Mephiston Red
- Vallejo Black lotus -> Black Templar
- Dark silver -> Leadbelcher
- Bright silver -> Stormhost Silver
- Dark umber -> Dryad Bark
- Light umber -> Baneblade Brown
- Dark Ivory -> Rackarth Flesh
- Bright Ivory -> Screaming skull