Legions Imperialis is close at hand. I’m putting my 3D printer to good use and churning out as many cool buildings as possible. In this post I’ll share what buildings I’m printing and my rough plan for the board.
The Test Building
I knew that before I began printing a ton of terrain I needed a test building. Luckily the resources available are plentiful on the web! My first building on the print bed is a free sample from Wargame Forge.
Spicing Up the Print
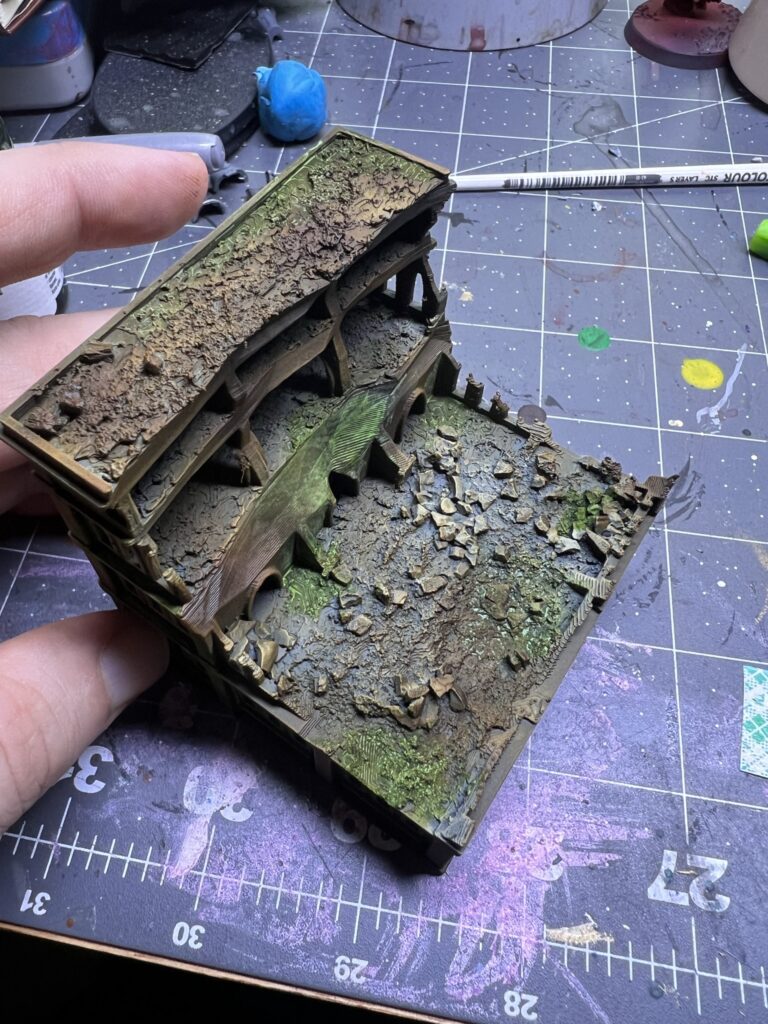
I add some Vallejo Desert Sand Basing paste and some rough basing chips from the Army Painter before I prime the model. The varying texture helps break up the printed look of the model. It looks rough when applied, but don’t panic it all looks uniform soon.
Painting the Building
The painting process starts with a prime of black. Then, the model is sprayed with a rattle can at an angle to pick up the majority of the details with a medium grey color. Next, apply burnt umber to the building in a haphazard fashion. Paint this randomly either with a drybrush or airbrush if you have one. Then, drybrush the building with a tan color of choice to pop the details out. Finally, add some color interest with a mossy green to give the illusion of overgrowth.
Planning the Board
With the test building out of the way, we move on to more buildings. I print these buildings slightly larger to accommodate for the scale adjustment of Legions Imperialis, and also to add height to the board.


These models provide enough space for the new infantry to be placed on/in them without much issue. They are also super cool, and convey the sense of destruction that comes when two armies in the Warhammer Universe clash. Below is an image of several buildings printed and ready for paint.

The board itself
For the battlefield proper I am taking further advantage of the 3D printer. The files for the Dragons Rest city tiles are perfect for this. They look very similar to the advertised tiles from Games Workshop, but at 6×6 inches they provide greater flexibility in board layout. I print a test out for these tiles as well. The detail is immaculate and gets me super excited about what an entire board of this caliber will look like.

Next steps
I’ll continue on this path and keep printing. At the time of me writing this article I have almost a full 3 foot by 3 foot board of the tiles printed. Stay tuned for updates on the project!
