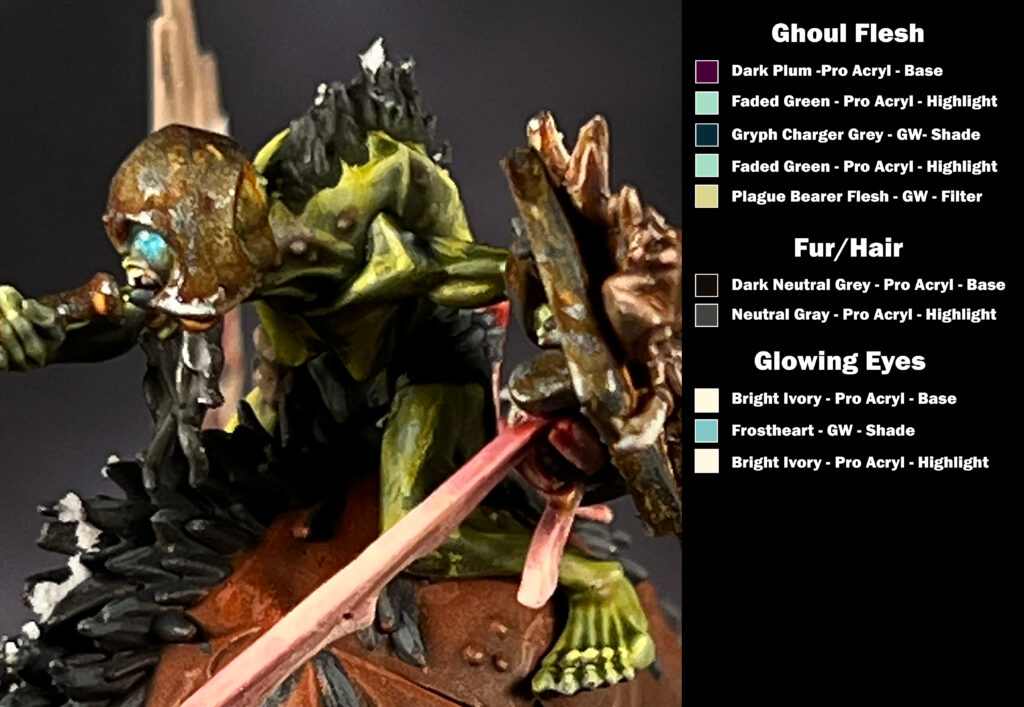
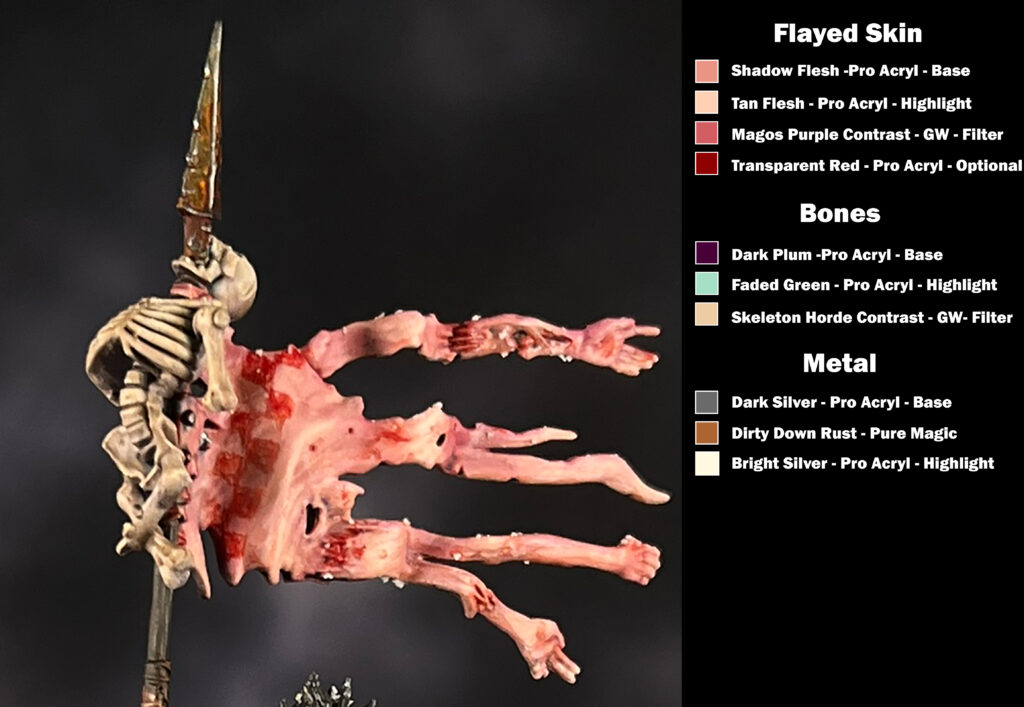
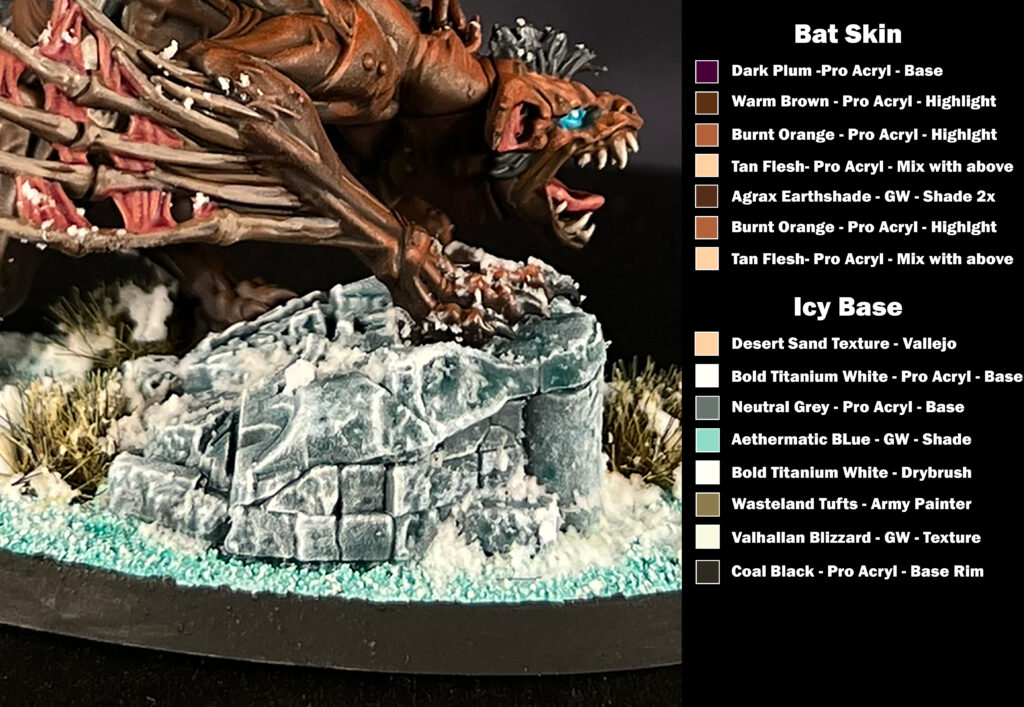
Welcome to Pallete Playbook! In this blog post I will go over a brief Morbheg Knight Tutorial defining what colors I used for various parts of models that I have painted. This is the first in this series utilizing the Morbheg Knights Games Workshop sent me as a review copy.
There are many ways to approach miniature painting these days. Airbrush, drybrush, traditional layering. Whatever method you think is best for you is what I absolutley recommend. In this overview, I’m simply going to go over the colors I used to acheive my look, not how they were applied to the model. As long as the colors are similar you should acheive a similar (probably better) result. I will go through the order in which I applied colors.
At the end of the article, there will be a list detailing alternative paint brands to the paint that I used for a given task if it is different than Games Workshop’s brand.
Ghoul Skin, Fur, Eyes

Flayed Skin, Bone, Metallics

Bat Skin

Wrap up:
I hope that this brief tutorial was informative and helps you try new things when painting your Morbheg Knights. If you want to get a set for yourself, you’ll need to head over to the Games Workshop Webstore and order some, or pick some up from your FLGS. At the time of writing this article, they are only available in the Flesh Eater Courts army box, but I’m sure that they’ll be available independently soon.
Key Terms:
Below are descriptons of what I mean by the words found in the images:
- Base – A solid basecoat of paint that does not have any color showing through from the layer below.
- Highlight – Directional based application of paint to help define a shape or line on the model leaving some previous color showing.
- Shade – A coat of paint that tints the layers below and also flows easily into the cracks/recesses of the model.
- Drybrush – Using a slightly damp brush remove most of the paint, and flick the brush across the edges of the model.
- Mix – Combine two colors together, usually with the color that proceeded a step containing this instruction.
- Filter – A thin coat of a more translucent paint to tint the colors below.
- Texture – A premade texture paint produced by a company.
Alternate Paint List:
I highly recommend Pro-Acryl for my painting process in most cases. You can purchase them on the Monument Hobbies website. It is completely understandable to want to use other colors though, so I have made a list of some similar colors from the Citadel paint range below:
- Dark Plum – Barak Nar Burgundy
- Faded Green – Ionrach Skin
- Dark Neutral Grey – Eshin Grey
- Neutral Grey – Dawnstone
- Bright Ivory – Wraithbone
- Shadow Flesh – Cadian Fleshtone
- Tan Flesh – Kislev Flesh
- Dark Silver – Leadbelcher
- Silver – Stormhost Silver
- Warm Brown – Mournfang Brown
- Burnt Orange – Squig Orange
- Bold Titanium White – White Scar
- Coal Black – Corvus Black
- Transparent Red – Blood for the Blood God
- Dirty Down Rust – No GW equivalent (it’s magic in a bottle just buy it)
Other tutorial posts:
If you made it to this line, you probably liked the tutorial! You can find more like this in the blog section of the site or go check out more pictures in the gallery!

This is amazing work! Very detailed in to the paints you used, and thank you for listing the similar colors!
Thank you!
Wow!